Everything you make, that isn't store bought, is a project !
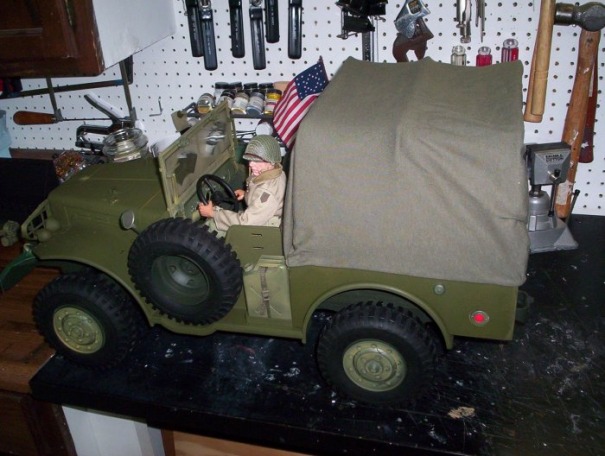
Turning a 21st Century Command Car into a Weapons Carrier

After a little horse trading with Pointman, I aquired a TUS Command Car with the express idea to turn it into a Dodge Power Wagon Waepons Carrier. The first step was to take my Dremel Tool and cut off the rear section of the body, leaving the rear fenders, floor and frame.
Making the pickup bed
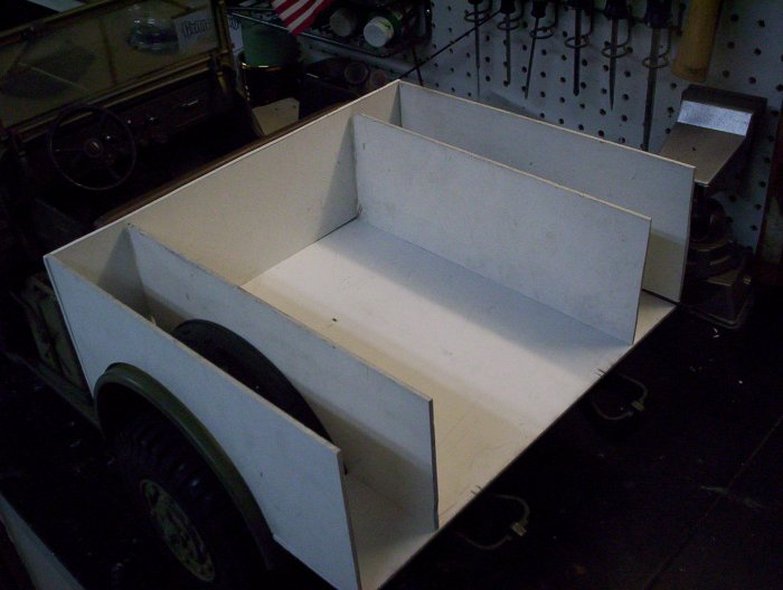
Using sheets of plastic from work that is easily cut with a box cutting knife, I began making the pickup bed. I turned the truck up on it's side to accurately trace the cruve of the rear fender. I measured the areas of the floor and reproduced their dementions to the plastic sheet and cut it and fit it to the frame.
Taking shape
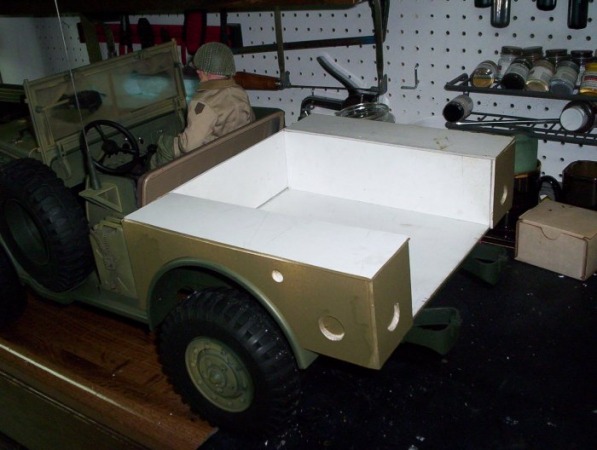
Continuing with cutting top and rear panels of plastic to cover the fenders, I also used a 1/2 inch wood cutting drill bit to cut the holes needed for tail lights and markers. I used KRAZY Glue to tack everything together.
Creating the bows for the rear cover

I cannot believe how good this plastic sheet cuts. I'm not big on detail. My thought is, don't worry about what the camera can't pickup. I fashioned one bow and then used it as my pattern to make the others. This picture shows where I glued the backboards to the wrong side of the bows. Not to worry...just take them off and re-glue them.
Coming together
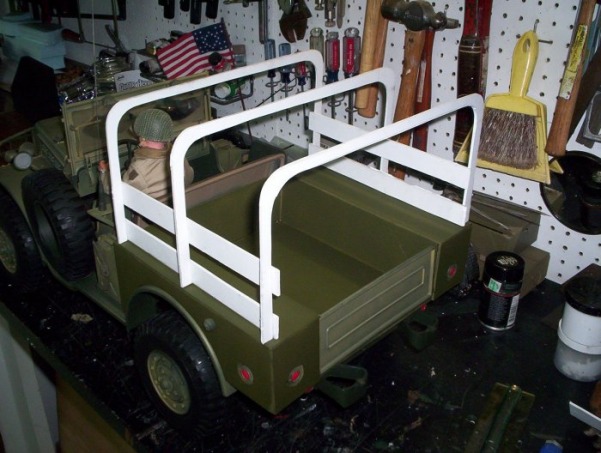
With the backboards glued on the proper side, I jast applied glue to the bottoms of the bows and set the structure in place and allowed to dry. I also used the tailgate from the Command Car as my Weapons Carrier tailgate. I used Sculpey to make a hinge-like devise to attach the tailgate to the pickup bed.
Add a little paint...
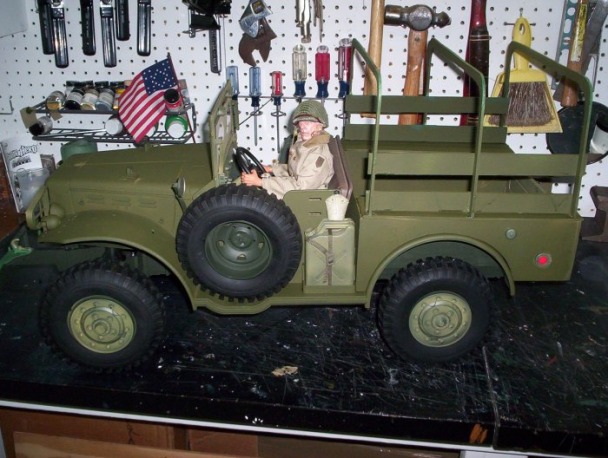
I use Testor's spray paint #1910 Dark Green on all my WWII US vehicles. I like them to all look alike.
Covering the rear
Using a Olive Drab "T" Shirt that my nephew gave me, I cut a section of the shirt to make my cover. I used hot melt glue to tack down the shirt material.
Covering the driver
Using another small piece of the "T" shirt, I used hot melt glue to tack it across the top of the windshield and then used straight pins to pin it to the rear section. If I un-pinned the top over the driver, I can easily lift the whole pickup bed off the frame and inter-change it with another body to be made in the future...like and ambulance.
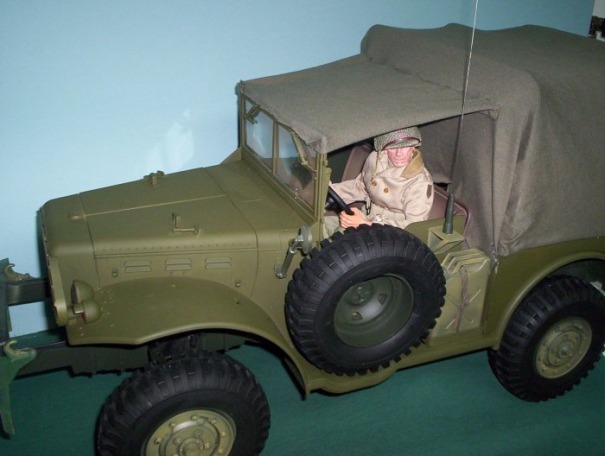
Dodge Power Wagon, Weapons Carrier
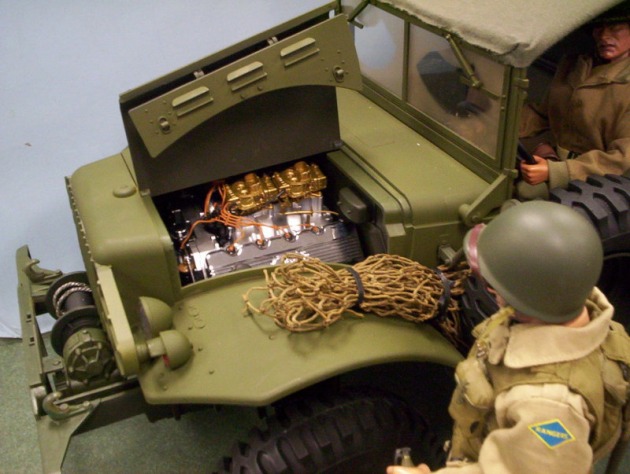
Sporting a Ford 427 DOHC engine. If I ever get a Hemi, I'll stick it in.
Indian Tipi (teepee)
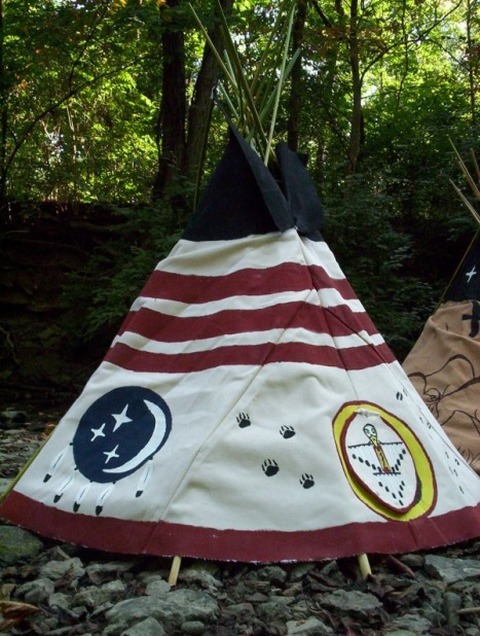
Made from the canvas covering of an outdoor umbrella, I cut out the pattern, had my Wife sew the seam, then it was hand painted with acrylic paints. I used cattails for the poles...peeled and dried. This is a scale 15 foot tipi.
41 Willys Hot Rod
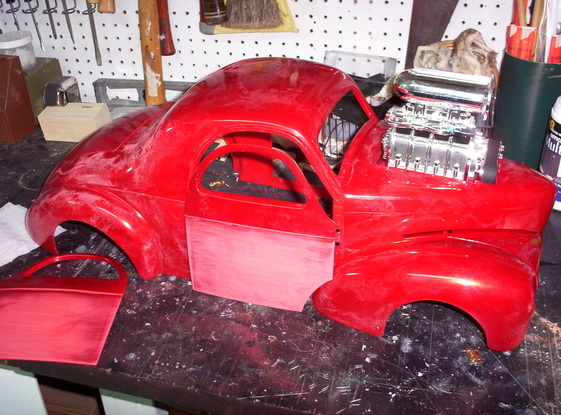
It started out red with terrible gold flame tampos. I decided to make a better looking hot rod so I torn it all apart.
The rolling chasis

The interrior stayed the same. This overhaul was done during the middle of winter.
Paint was applied
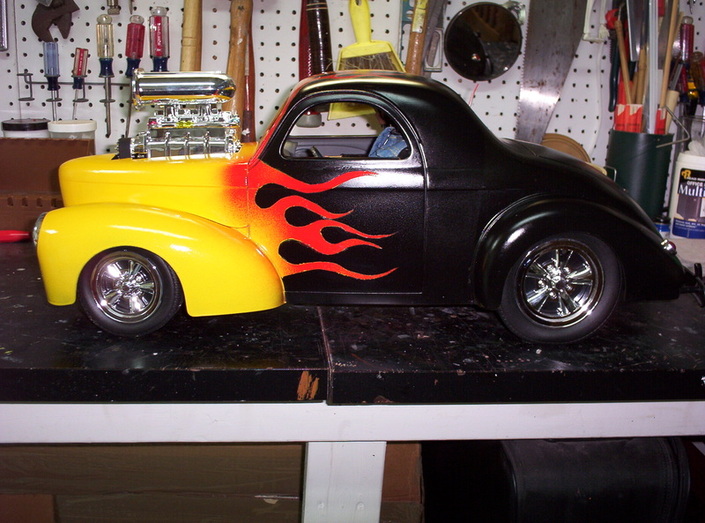
I'm terrible at doing these project photos. I start and I forget to pause and take progress pictures. I painted the body in a flat black and then laid out the pattern for the flame job. Once the yellow flames were applied, I fogged red into the tips.
Details
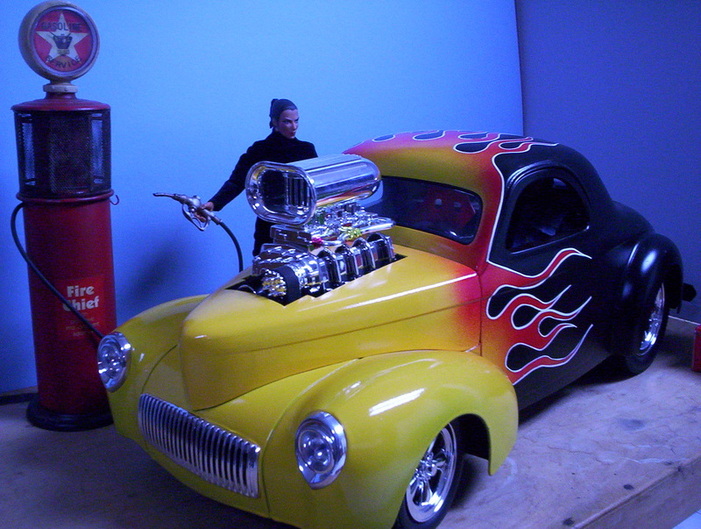
Once the paint was dry I sent about the task of creating pinstripes to go around the edges of the flames...to make them POP !!!
TOW Missile Rack
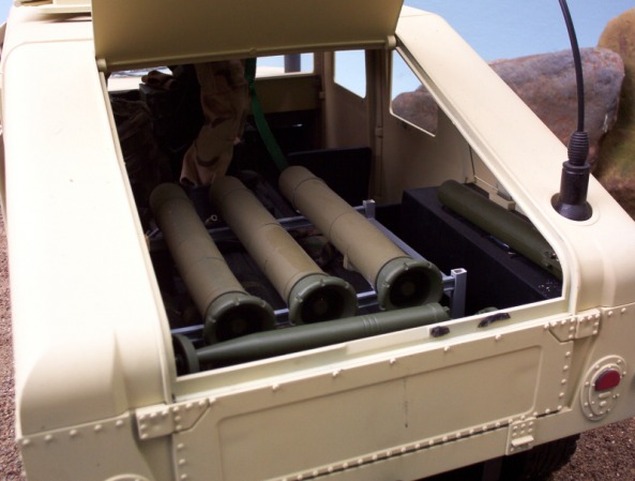
The HumV is a Power Team product but once you start customing it and accessorizing the inside it comes a project. The TOW Missile Rack was made with styrene stock from the hobby shop. I used rectangular and I-beam stock and pieced together the basic rack. I used my DREMEL Tool to cup up the frame to cradle the missile tubes.
Ford Model "T" Truck 1920's
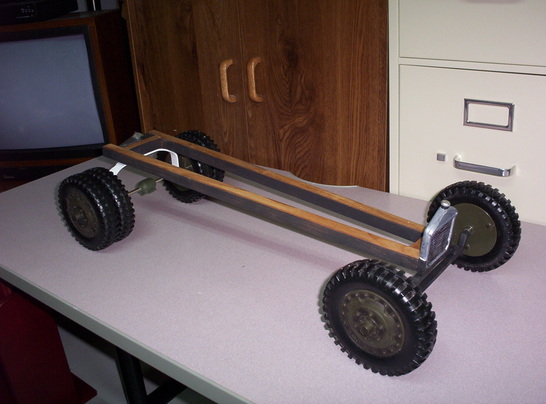
Here is the rolling chasis made from salvaged wood from work and the wheels and tires from a Hasbro M8 Scout Car. The grill was created by me from plastic sheets, salvaged from work.
The stakebed is built and added
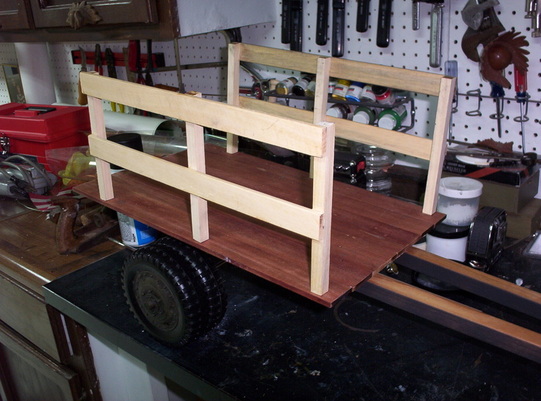
Again, made from different pieces of wood, from work, I made a stakebed for the truck that could be taken apart, but mounted very securely for travel and pictures.
The cab is created
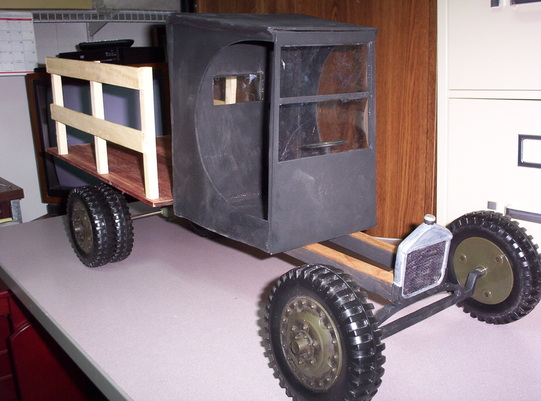
Using parts from an old 21st Century HumV and a couple of New Ray motorcycles, I created the "C" Cab for the truck. The front is removable to again access to the floor to screw it in place.
Come together...right now...
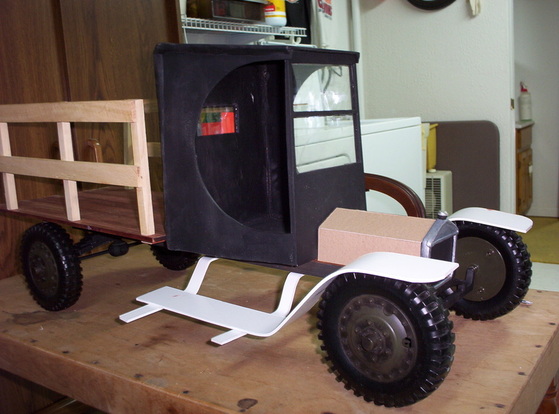
The fenders were created from plastic sheet stock from work, along with the support brackets and running boards. The hood was made from chipboard. Radiator and gas caps came from the New ray motorcycles, as well as the headlights, marker light and tail light. The bench seat was made from a couple pieces of ceadar and red leather upholstery.
It's taking shape now
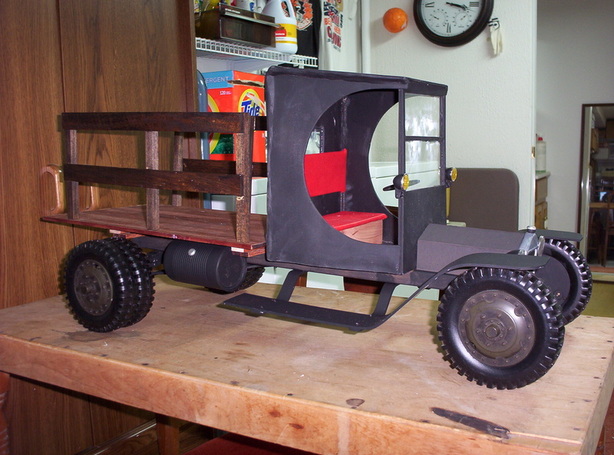
Flat black paint covered everything. Soup cans were used to make the saddle gas tanks. It's ready for pictures. I made a gangster figure many years ago, I figured he needed a truck to haul boot-leg whiskey around in.
Scale Quonset Hut
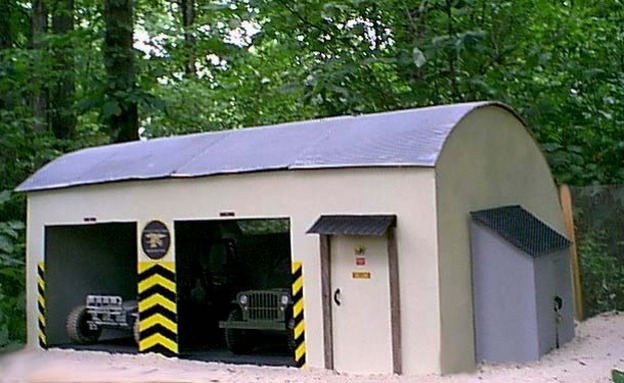
Made to look like a the Quonset Huts we used in the Navy...this particular one was modified with a flat side to accommodate two garage doors and a passenger door. Made from some scraps of plywood, some cardboard, screening for the back windows and fencing and corrugated squares from a local pizza parlor to make the tin roof...I used Sculpey to fashion door handles for the gear locker and front door. Then I painted everything else.
The Flatboat Project
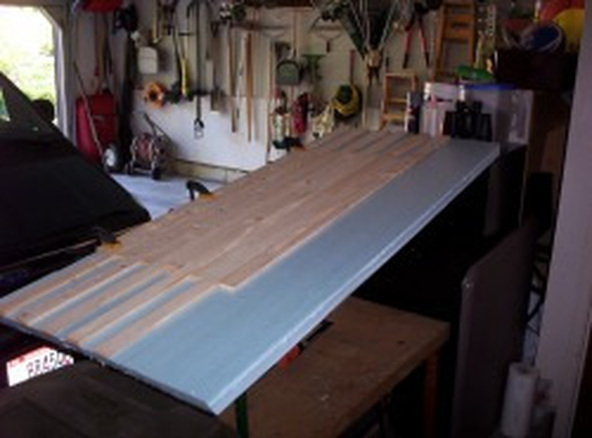
I think the flatboat project was an idea of Pointmans'. I think he suggested that I build it, since FUBAR had backed out of doing the redezvous phot set. Once I got motivated to do the flatboat, it took a couple years to build or buy all the stuff to accessorize it.
FUBAR suggested using construction style insulating foam for the base, to make it float, then I found rough cut wooden chimes at Lowe's to make the flatboat structure. The wood was Gorilla Glued to the foam, since it's waterproof.
FUBAR suggested using construction style insulating foam for the base, to make it float, then I found rough cut wooden chimes at Lowe's to make the flatboat structure. The wood was Gorilla Glued to the foam, since it's waterproof.
Planning out the setup of the boat
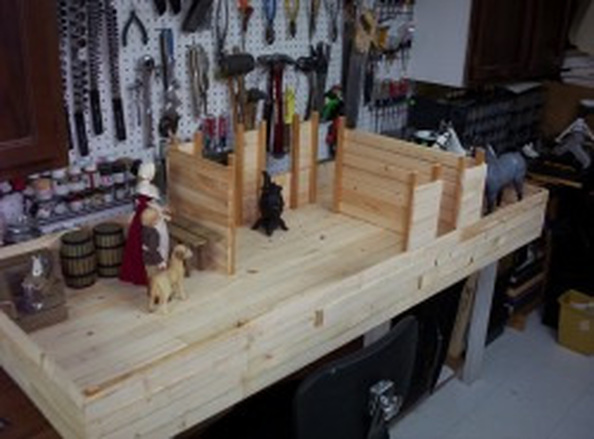
I made the boat a scale 30 footer, that allows a scale 10 feet for the bow, 10 feet for the center and 10 feet for the stern. You can see that I used MARX horses to make sure I had room for livestock in the rear section. I constructed walls for the cabin that I could stand up along the sides of the boat so i could have a better visual.
Inside the flatboat cabin
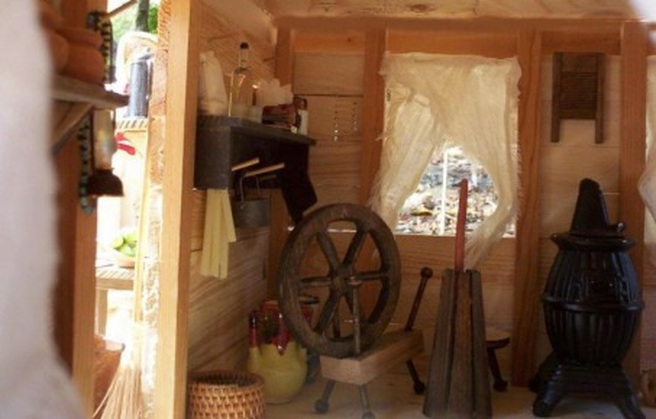
The pot bellied stove is an insense burner, I found lots of little items on ebay and then I had to make stuff like the rope bed, butter churn, spinning wheel shelves and stools myself. I used plain birthday cake candles and glued their wicks together to make them look like they were hand-dipped candles. Lots of eye candy on this boat.
Finished Flatboat
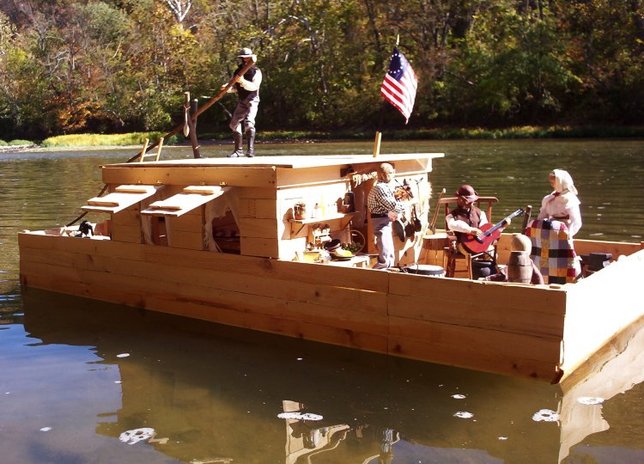
The flatboat has made a couple floats on the Little Miami River for photo shoots. The figures are better in the second set of pictures than the first float. The boat floats so well, it floated down stream while I turned around to get my camera. I had to find a way to anchor it while taking the pictures.
Custom Choppers
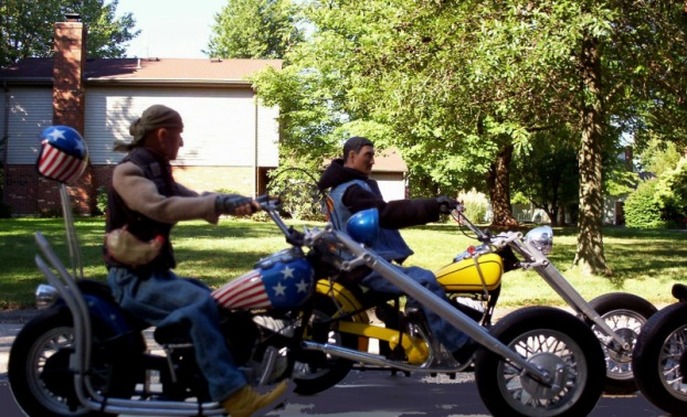
Using the New Ray, Indian Motorcycles, I tried making Harley Davidson Choppers. Taking the bikes completely apart and using the DREMEL Tool to cut and extend the forks and modify the frame, I used plastic tubing with wire inside as exhaust pipes and painted them silver. Large finishing nails were bent, cut and used for handle bars, while plumbers solder was bent into shape, hooked over the rear axle and used as the sissy bars, paint, decals and pin stripping finished it all off.
The Covered Wagon Project
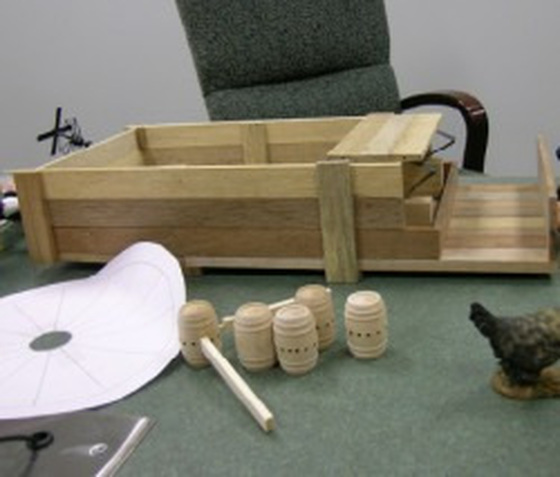
Using scrap wood from work, I constructed most of the covered wagon with it. I used embroidery hoops to make the wagon wheels and banding steel to make the wagon seat springs. Wooden kegs were used at the hubs for the wheels and basswood for the spokes.
Coming together
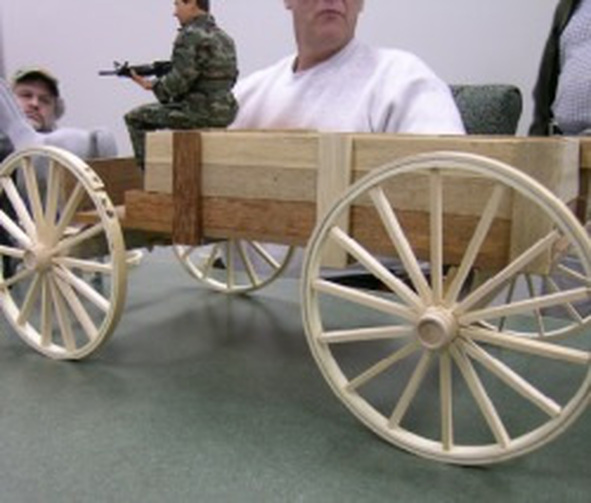
Studying a variety of wagons on display at a local flea market, I got ideas to make the wagon suspension and mounted the finished wheels.
Another View
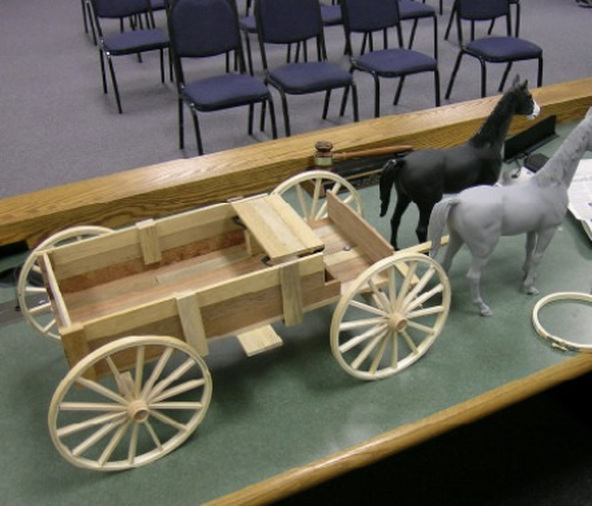
I styled this wagon after the MARX BOTW wagon. I can remove the cover and two top boards from either side and turn this into a buckboard, or add the cupboard and make it into a chuckwagon.
Chuckwagon style
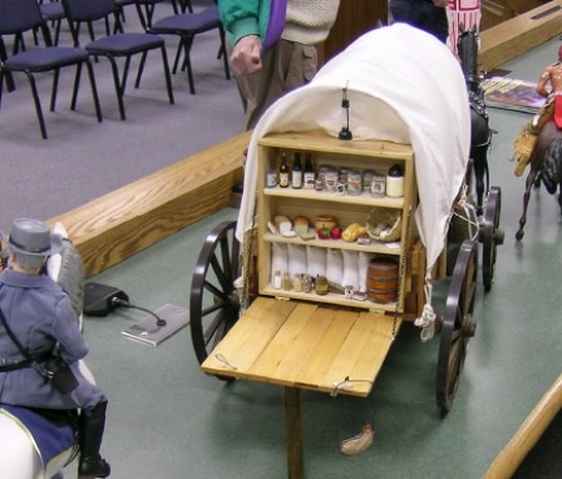
All together, stained and varnished the cupboard is opened to show off food stuffs
Didn't you see the arrow... Arrow...I didn't see the Indians
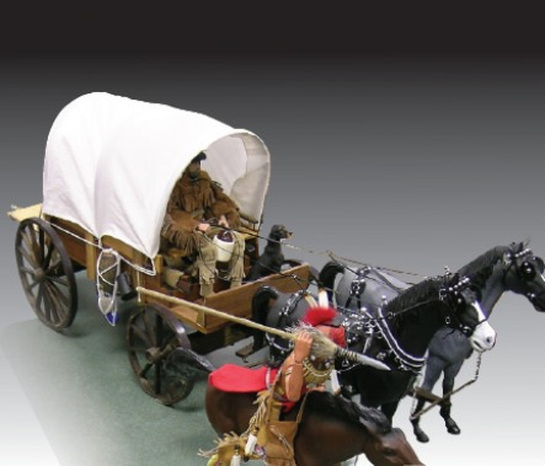
The teamster has his crockery jug between his legs while Pawnee Indians attack the wagon.
Out for a photo shoot
Used as a Federal supply wagon, I did the first set of pictures using the wagon in a Civil War setup.
The Hut !
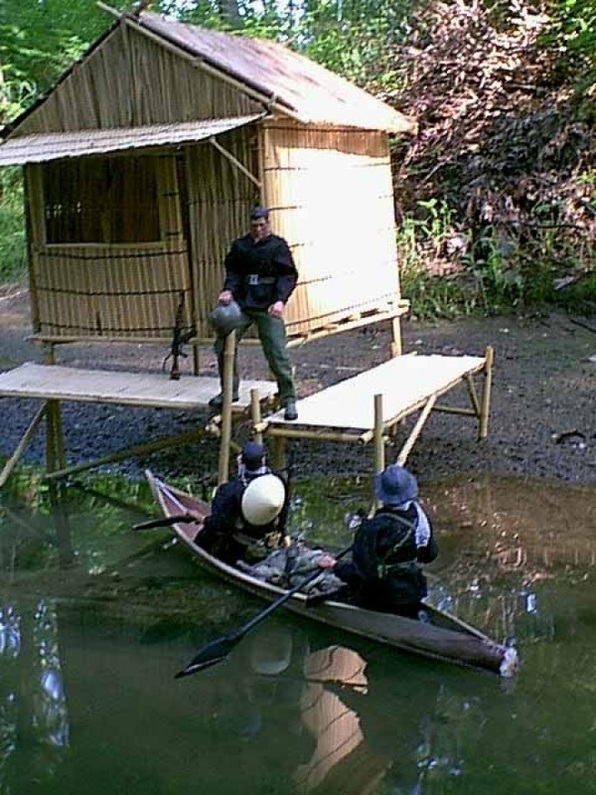
I went to Pier 1 Imports and purchased a bundle of bamboo sticks, 8 different place mats made of split bamboo and reeds, I constructed the basic frame of the hut and used all purpose screws to hold it all together. I also wanted the hut to have a removable top and wall so I could take indoor photos so I used wire and twisties from bread bags, or twist-ties, to attach and un-attach them. The DREMEL Tool came in handy for cutting the place mats and drilling holes for the porch roof supports. The front door has twist-ties for door hinges too ! I made one window in the front and used black plastic screening and glued it in place with hot melt glue. The two sections of dock were made the same way with bamboo, screws and glue.
Food & Folding Furniture
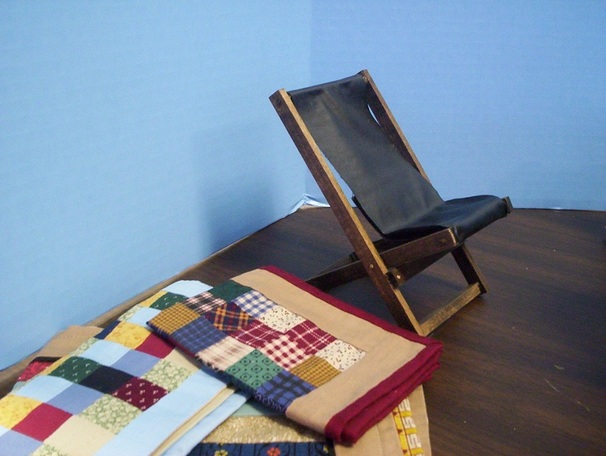
This was actually two projects in one photo shoot. I have a little collection of scale patchwork quilts made by Snakes' wife from the Sixth Brigade site and Gray Ghost's mother. I'm also showing this working, folding, camp chair, made with basswood and mini dowel rods, material for the chair and hot melt glue.
More Folding Furniture
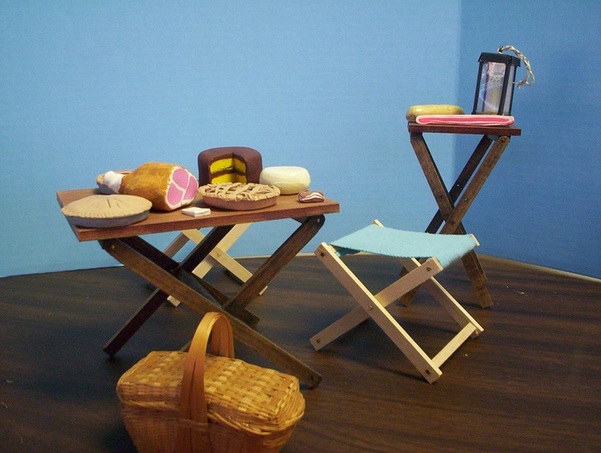
Folding tables of different sizes and a couple of folding camp stools, all made with the same materials but I stained the table. The food stuffs are all made from Sculpey. I'm colorblind so these are all made with colored Sculpey to create the illusion. The only thing I painted was the skin of the ham. I think the color said honey brown.
I choose these food items to make after reading Morgan's Raid (during the Civil War) the Confederate Raiders would stop at area farms and get these food items from the wives of the farmers, who had been baking all morning and smoked hams hung in the smokehouse. They were literally eating ham sandwiches on horseback with pie and cake for dessert.
I choose these food items to make after reading Morgan's Raid (during the Civil War) the Confederate Raiders would stop at area farms and get these food items from the wives of the farmers, who had been baking all morning and smoked hams hung in the smokehouse. They were literally eating ham sandwiches on horseback with pie and cake for dessert.
Making me hungry
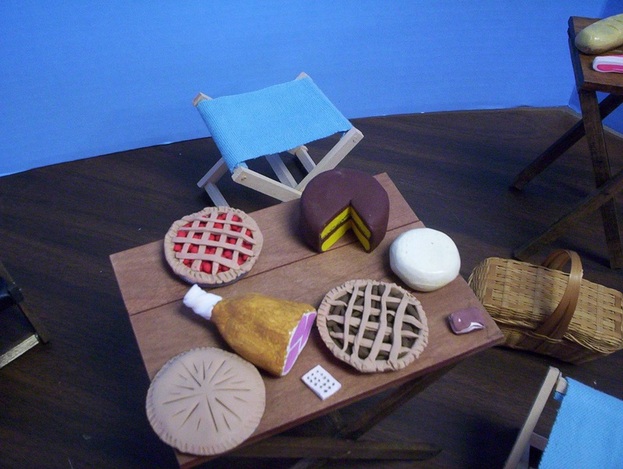
An overhead shot of the food shows a few pies, a wheel of cheese, a layer cake, ham, hard tack and a chunk of salt pork. I used a BOTW frying pan as my pie pan and laid a piece of wax paper in the bottom of the pan, once the pie was created I could gently lift it out of the frying pan to be put in the oven to bake.
A few more items
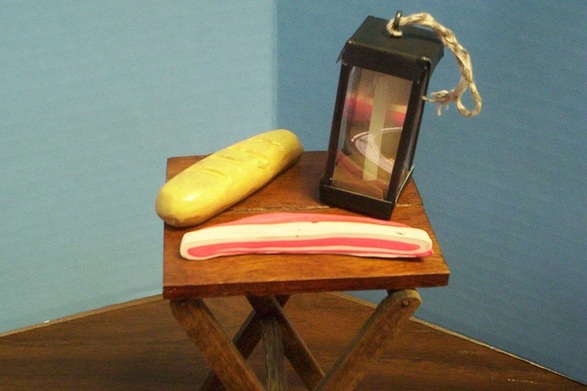
Finally we see a loaf of bread, slab of bacon and a lantern I made with flashing material and a birthday candle.
Accessories for the Power Team HumV
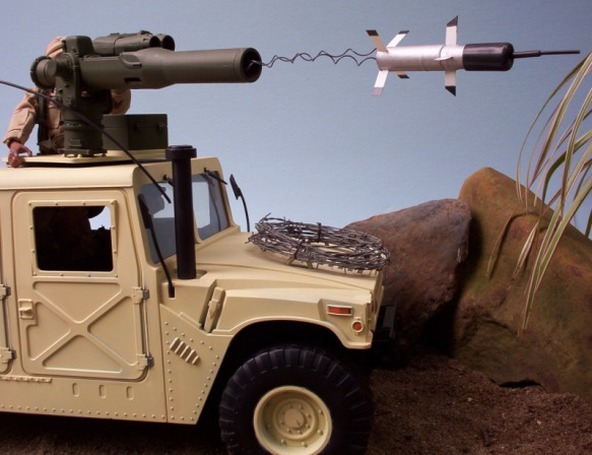
It was easy to mount the 21st TOW Missile Launcher to the Power Team weapons ring. Then I took stainless steel wire and cut and twisted barbs around one side of my doubled length of wire. I ran the wire around a water pipe and using a small Vise-Grips, I clamped the ends of the wire and began twisting them until I achieved the desired look of my barbed wire coil and then strapped it to the hood of the HumV. I found out from a fellow member from GreenLeader's site how to make a TOW Missile. He used a Tampon tube, some styrene fins and a plastic end cap to fashion the missile. Then he coiled wire and pulled the coils to the desired look and inserted them into the tail end of the missile and the tube of the launcher.
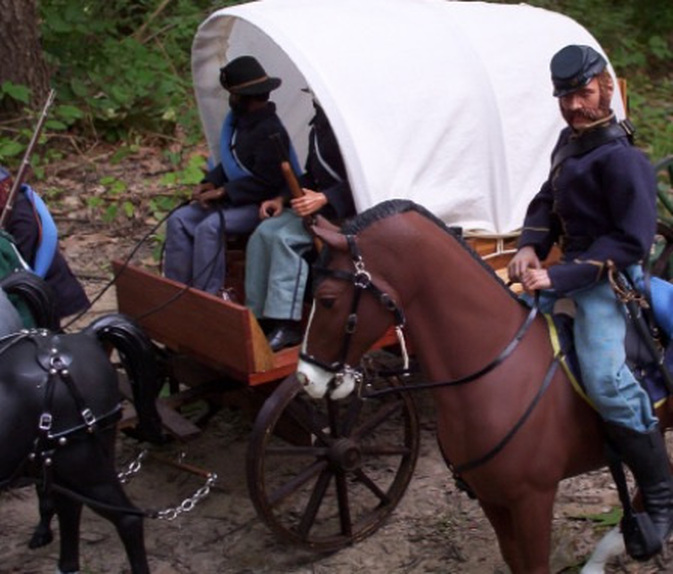
Sculpey to make the McClellan Saddle
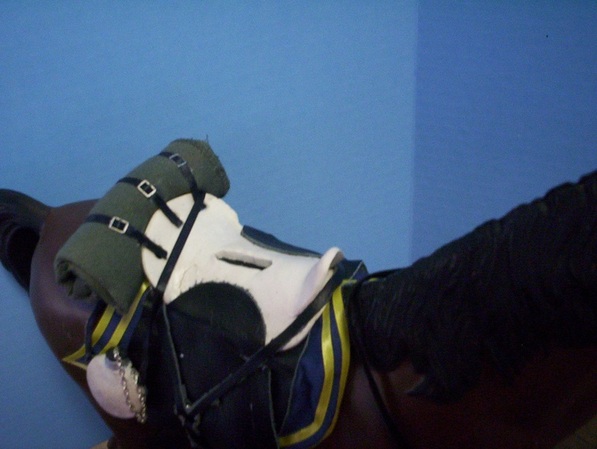
Gray Ghost turned me on to this idea of using Sculpey to make the saddle tree. I put the Sculpey over the back of the horse to get the right contour and then baked it. Once it was done I added the leather, drilled holes across the back and strapped on a bed roll. The canteen is also made out of Sculpey, straight pins and small jewelers chain.
Saddle the horses
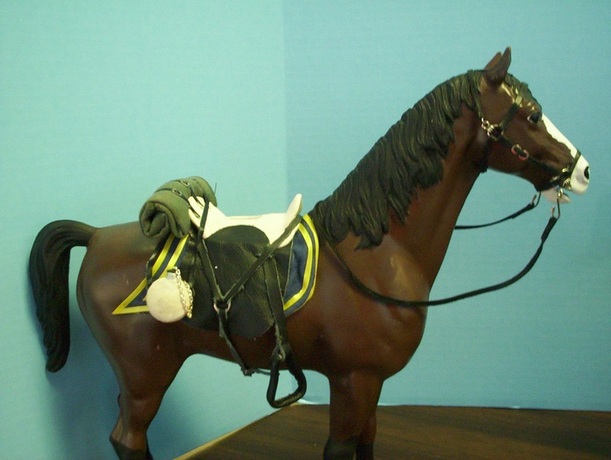
I got the saddle blanket out of the Grab Bag from the Sixth Brigade site. The stirups are pieces of wire, bent into shape and then covered with leather and hot melt glued. The the belly strap is made just like a real saddle would have and works with miniature rings from Hobby Lobbys' Jewelry Dept. The ends of the straps are just folded over and glued with hot melt. The bridle is also made with components from Hobby Lobbys' jewelry dept.
